Stagger
Cascade layers and keyframes across time with precise offset control. Align to the first item or the playhead, stagger by exact frame intervals, randomize with min/max ranges, flip time assignments, and group layers by label color or by fixed chunks — the fastest way to build rhythmic, sequential animations across large selections.

Overview
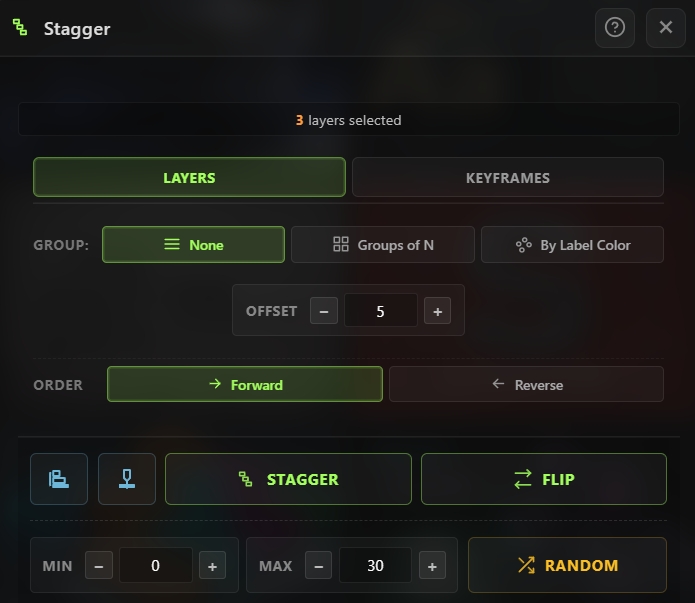
Stagger is a temporal distribution tool that lets you cascade layers or keyframes across time with precise offset control. Align a whole selection to a single anchor, stagger items by exact frame intervals, randomize their timing within a min/max range, or flip their time assignments to reverse the cascade order. Switch between Layers mode (works on layer in-points) and Keyframes mode (works on selected keyframes), and use powerful grouping options to treat consecutive layers as single units, group layers by label color, or process keyframes per-property or per-layer. A live info bar shows the current selection count and key/layer breakdown, so you always know what Stagger will operate on before you click.
Features
Two Modes
- Layers mode — All operations work on layer in-points (start times)
- Keyframes mode — All operations work on the currently selected keyframes
- Switch modes with a tab toggle — settings adapt to the active mode
Grouping Options (Layers Mode)
Treat consecutive layers as units before staggering:
- None — Each layer is its own unit (no grouping)
- Groups of N — Group every N consecutive selected layers together; configurable N value (1–999)
- By Label Color — Group consecutive layers that share the same label color automatically
Grouping Options (Keyframes Mode)
Treat keyframes differently for group operations:
- Each Property — Each animated property is its own row (e.g., Position keys and Scale keys are separate groups)
- All Keys per Layer — All keyframes from the same layer are grouped into a single unit
Align Operations
Two one-click align buttons that snap the whole selection to a single anchor:
- Align to First — Move every selected layer/keyframe group to match the earliest item's time
- Align to Playhead — Move every selected layer/keyframe group to the current composition playhead
Stagger Operation
- Stagger — Offset each item by the Offset value (in frames) in the selected order direction
- Cumulative — Each click adds more spacing, so pressing Stagger twice doubles the gap
- Respects grouping — groups move as single units, not individual layers
Flip Operation
- Flip — Reverse the time assignment of selected items
- Keeps the existing times but mirrors which item gets which time
- Perfect for reversing a stagger without recalculating offsets
Random Operation
- Random — Randomize each item by a uniformly random offset between Min and Max frames
- Min and Max can be negative, letting you scatter items both forward and backward in time
- Each click produces a new random distribution
- Respects grouping (grouped items move together)
Order Direction
- Forward — First selected item fires first (ascending)
- Reverse — Last selected item fires first (descending)
- Applies to Stagger, Random, and align operations
Offset & Range Controls
- Offset stepper — Stagger step in frames (1–600)
- Group size (N) stepper — Only visible when grouping is set to "Groups of N" (1–999)
- Random Min / Max steppers — Range for random offsets (−600 to 600 frames each)
- All values persist across sessions
Live Selection Info
The top bar shows real-time information about what's selected:
- Layers mode — Layer count, grouping preview
- Keyframes mode — Selected key count, total key count, selection time span in frames
- Auto-refreshes every 500 ms so you always see the current state
- Dimmed messages for common problem cases ("No comp", "No layers selected", "No keyframes selected")
Persistent Configuration
- Every setting (mode, grouping, offset, random range, order direction) is saved to local storage
- Reopen Stagger any time and continue with your previous settings
How to Use
Stagger a Row of Layers
1. Select the layers you want to cascade. 2. Open the Stagger tool from the Quick Tools menu or toolbar. 3. Make sure Layers mode is active. 4. Set the Offset value (e.g., 5 frames). 5. Pick an Order direction — Forward (first layer fires first) or Reverse (last layer fires first). 6. Click Stagger — layers are offset by the chosen amount, cascading from the first. 7. Click Stagger again to add more spacing — each click is cumulative.
Stagger Grouped Layers
1. Select the layers. 2. Pick a grouping option: - Groups of N with N=3 to group every 3 consecutive layers as one unit - By Label Color to group layers sharing the same label color 3. Click Stagger — groups cascade together as single units.
Align Everything to the Playhead
1. Select layers (or keyframes in Keyframes mode). 2. Click the Align to Playhead icon button. 3. Every selected item snaps to the current time.
Randomize Timing
1. Select the items you want to scatter. 2. Set Min and Max values in the Random row (e.g., Min = −10, Max = 30 frames). 3. Click Random — each item gets a uniformly random offset in that range. 4. Click again for a new random distribution.
Stagger Keyframes
1. Switch to Keyframes mode at the top. 2. Select the keyframes you want to cascade in the timeline. 3. Pick a grouping option: - Each Property — each animated property cascades independently - All Keys per Layer — all keys from one layer move as a unit 4. Set the Offset and Order direction. 5. Click Stagger to cascade the selected keyframes.
Flip the Cascade
1. After staggering, click Flip to reverse which item gets which time. 2. The timing spacing stays the same — only the order is reversed.
Notes
- Stagger is cumulative — every click adds more offset. This makes it fast to tweak spacing: click until the cascade looks right, and if you overshoot, use Ctrl+Z to step back.
- By Label Color grouping is incredibly useful for production — color-code your layers by role (e.g., red for titles, blue for backgrounds), then stagger the whole selection and layers of each color cascade together.
- Negative Min values in Random mode let items move earlier as well as later — useful for creating natural-feeling chaos where some items anticipate others.
- Keyframes mode with Each Property grouping is the go-to for staggering animations — select all your position and scale keys across multiple layers, and each property cascades independently.
- Flip is a lifesaver when you need to reverse an animation's order without changing the visual rhythm — the offset values stay the same, just the assignment flips.
- Align to First is the fastest way to reset a selection to a single time before applying a fresh stagger — use it when you want to start over without manually dragging items back.
- The live info bar is your friend — always glance at it before clicking an action to confirm you have the right selection.
- Groups of N combined with a cumulative stagger creates interesting stepped rhythms — set N=2 to pair items, N=3 to create triplets, etc.
- Stagger operates on in-points in Layers mode, not on the entire animation — so staggering doesn't stretch or compress your keyframes, it just slides everything on the layer forward or backward in time.