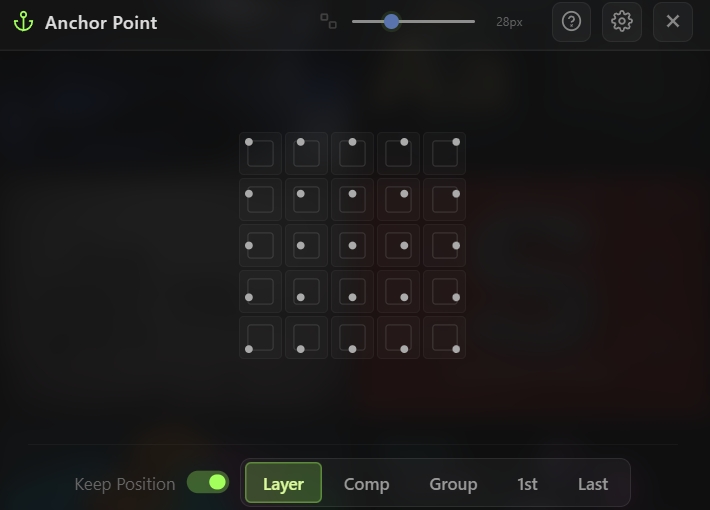
Anchor Point
Instantly snap the anchor point of any layer to one of nine precise positions with a single click. Works across multiple layers at once, with smart reference modes for layer bounds, composition, group center, or a specific reference layer.

Overview
Anchor Point is a precision anchor point positioning tool for After Effects. Click any of the nine grid positions to instantly move the anchor of selected layers to a corner, edge, or center — without affecting their on-screen position. Five reference modes let you align anchors relative to each layer's own bounds, the composition, a group's combined bounding box, or to a specific reference layer in your selection. A configurable 3×3, 4×4, or 5×5 grid gives you fine-grained control over where the anchor lands, and the Keep Position toggle ensures non-destructive anchor adjustments on animated layers.
Features
Nine-Point Grid Selector
- Click-to-snap grid for instant anchor placement
- Configurable grid density:
Multi-Layer Support
- Operates on any number of selected layers at once
- Each layer is processed independently based on the selected reference mode
- Full undo support via After Effects undo groups
Reference Modes
- Layer — Anchor aligns to each individual layer's own bounding box (default)
- Comp — Anchor aligns to a point inside the composition frame
- Group — Anchor aligns to the combined bounding box of all selected layers, treating them as one unit
- 1st Layer — All anchors reference the first selected layer's bounds, so every layer's anchor lands at the same relative point inside that reference
- Last Layer — Same as First, but using the last selected layer as the reference
Keep Position Toggle
- When enabled (default), the layer's visible position is preserved after moving the anchor — no jump or offset
- When disabled, only the anchor moves, causing the layer to reposition relative to the new anchor
- Essential for non-destructive anchor adjustments on animated layers
Visual Feedback
- Grid buttons show a preview dot indicating which point will be used
- Each reference mode has its own accent color for instant identification:
- The grid adapts its preview to reflect the active mode
How to Use
1. Select one or more layers in your composition. 2. Open the Anchor Point tool from the Quick Tools menu or toolbar. 3. Choose a reference mode from the bottom row: - Layer for individual per-layer anchoring - Comp to align anchors to a comp-relative position - Group to treat multi-selected layers as a single bounding box - 1st or Last to use one specific layer in the selection as the reference for all others 4. Click any point on the grid: - Corners snap the anchor to the corresponding corner of the reference - Edges snap to the midpoint of that edge - Center snaps to the middle 5. (Optional) Toggle Keep Position off if you want the layer to physically shift with the anchor. 6. (Optional) Click the settings cog in the header to change the grid density (3×3, 4×4, or 5×5).
Notes
- Layer mode is the everyday choice for quick corner pivots, scale anchors, and rotation pivots on a single layer.
- Group mode is ideal when you want a set of layers to rotate or scale as one unit around a common point — select all of them, pick Group, click center, and you're done.
- 1st and Last Layer modes are powerful for aligning a batch of layers to a specific anchor reference — useful when one layer defines the frame of reference for an entire composition.
- Keep Position should stay on for animated layers to avoid shifting existing keyframe values. Turn it off only when you intentionally want the layer to move.
- The tool respects 3D layers — Z-axis anchor values are preserved when adjusting X and Y.